
 Bookmark
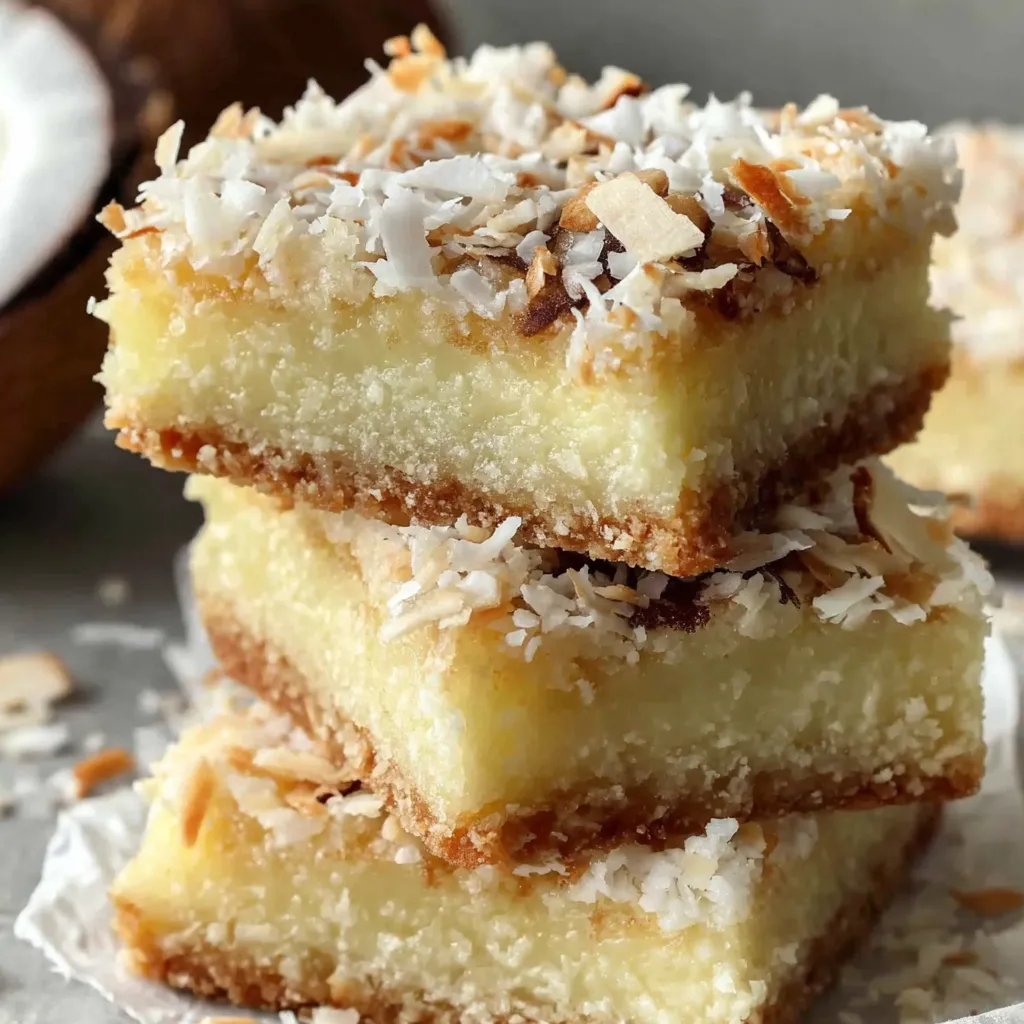
This hearty coconut bar recipe brings sunshine into your kitchen with its tropical flavors and perfect textures. The contrast between the buttery shortbread crust and the chewy, golden coconut topping creates an irresistible treat that's suitable for any occasion from casual family gatherings to elegant dessert spreads.
I first made these coconut bars for a neighborhood potluck during a summer heatwave. The tropical flavor transported everyone to a beachside paradise, and now they're requested at every gathering I attend. The recipe has become my signature dessert that friends and family constantly ask me to bring along.
Ingredients
- For the crust
- 1 cup unsalted butter softened provides the rich foundation and ensures proper binding
- ½ cup granulated sugar balances the saltiness in the crust without overwhelming sweetness
- 2 cups all purpose flour creates the perfect tender yet sturdy base for the topping
- ¼ teaspoon salt enhances the buttery flavor and balances the sweetness
- For the coconut topping
- 3 large eggs creates structure and helps the filling set properly
- 1½ cups granulated sugar provides sweetness that caramelizes beautifully when baked
- 1 teaspoon vanilla extract adds depth and warmth to the coconut layer
- ¼ teaspoon salt balances the sweetness and enhances overall flavor
- 1½ cups shredded sweetened coconut the star ingredient that toasts beautifully on top
- ½ cup all purpose flour binds the topping and prevents it from becoming too runny
Step-by-Step Instructions
- Prepare the Crust
- Preheat your oven to 350°F. In a large bowl cream together the softened butter and granulated sugar until the mixture becomes light and fluffy about 3 minutes. Add the flour and salt gradually mixing until a crumbly dough forms that holds together when pressed. Press this mixture evenly into a greased 9×13 inch baking dish making sure to create an even layer without any thin spots. Bake for 15 to 18 minutes until the edges just begin to turn a delicate golden color.
- Make the Coconut Topping
- While the crust bakes prepare your topping. In a medium bowl beat the eggs vigorously until they become slightly foamy this creates the perfect texture in the final bars. Add the sugar vanilla extract and salt mixing until fully incorporated. Fold in the flour and shredded coconut making sure everything is evenly distributed. The mixture should be somewhat thick but still spreadable.
- Assemble and Bake
- Remove the hot crust from the oven and immediately pour the coconut mixture on top while the crust is still hot. Using a spatula gently spread the topping into an even layer reaching all corners of the pan. Return to the oven and bake for an additional 20 to 25 minutes until the top becomes beautifully golden brown and the center is set but still slightly soft.
- Cool and Slice
- Allow the bars to cool completely in the pan on a wire rack at least 1 hour. Once fully cooled run a knife around the edges of the pan to loosen then slice into squares or rectangles. For the cleanest cuts use a sharp knife wiped clean between slices. The bars should have a crisp edge golden top and chewy interior.
 Bookmark
The sweetened coconut is truly the heart of this recipe. I discovered its magic during a trip to Florida where I tasted authentic coconut bars made by a local baker. The way the edges caramelize while keeping that chewy center is what makes these bars completely irresistible. My children now recognize the distinct coconut aroma wafting from the kitchen and come running with excitement.
Perfect Texture Tips
The success of these coconut bars relies heavily on texture. When preparing the crust be careful not to overwork the dough which can develop gluten and create a tough base instead of the tender crumbly texture we want. Press the dough firmly but gently into the pan to create an even layer that will support the topping without becoming dense.
For the topping make sure to beat the eggs properly this creates air bubbles that help the coconut layer achieve that perfect chewy yet light texture. The coconut should be evenly distributed throughout the filling mixture before spreading onto the crust. Watch carefully during the final baking stage as the coconut can go from perfectly golden to overly browned quickly due to its natural sugar content.
Storage and Freezing
These coconut bars remain fresh when stored in an airtight container at room temperature for up to three days. Layer them between sheets of parchment paper to prevent sticking. If your kitchen is particularly warm or humid storing them in the refrigerator will maintain their texture better though I recommend bringing them to room temperature before serving for the best flavor experience.
For longer storage freeze the bars in a single layer initially then transfer to a freezer safe container with parchment between layers. They will maintain excellent quality for up to two months. Thaw them overnight in the refrigerator or for a few hours at room temperature before serving. The texture remains remarkably consistent even after freezing which makes them perfect for advance preparation for events.
Customizing Your Coconut Bars
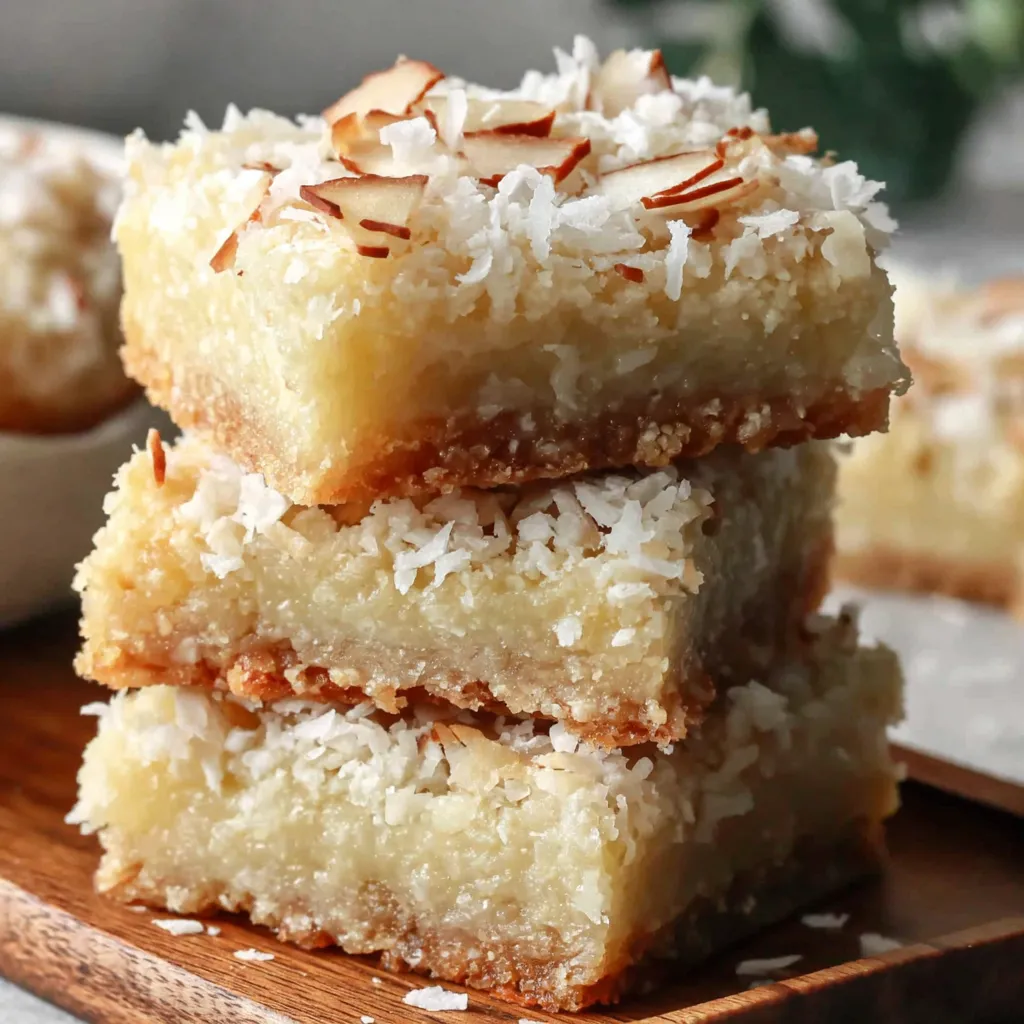
While the classic version of these bars is perfect on its own experimenting with additions can create delightful variations. Adding a handful of chopped macadamia nuts complements the tropical coconut flavor beautifully. White chocolate chips melted and drizzled over the cooled bars create an elegant presentation and added sweetness.
For a more complex flavor profile try adding a teaspoon of almond extract along with the vanilla or incorporating a tablespoon of citrus zest into the topping. During holiday seasons I sometimes add dried cranberries to the coconut mixture for a festive red and white appearance. Each variation maintains the wonderful texture while offering a new flavor experience.
Recipe FAQs
- → How do I know when my coconut bars are done baking?
The coconut bars are done when the top is golden brown and the center is set. You can test by gently pressing the center - it should feel firm with just a slight give, not wet or jiggly. The edges will typically be a darker golden color than the center.
- → Can I use unsweetened coconut instead of sweetened?
Yes, you can substitute unsweetened coconut for a less sweet version. Since sweetened coconut contains additional sugar, you might want to add 2-3 tablespoons more sugar to the topping mixture if you prefer the same level of sweetness. The texture may also be slightly different, as unsweetened coconut tends to be drier.
- → Why did my crust turn out tough instead of tender?
A tough crust usually results from overmixing the dough or using cold butter. Make sure your butter is properly softened before creaming it with sugar, and mix the flour in just until combined. Overworking the dough develops gluten, which creates a tough rather than tender texture.
- → How can I get clean, neat cuts when slicing the bars?
For the cleanest cuts, make sure the bars are completely cooled before slicing. Use a sharp knife and wipe the blade clean with a warm, damp cloth between cuts. For extra precision, you can chill the bars in the refrigerator for 30 minutes before cutting, which helps firm up the filling.
- → Can I add chocolate to these coconut bars?
Absolutely! You can add mini chocolate chips to the coconut topping before baking, or drizzle melted chocolate over the cooled bars. For a more decadent version, you could even add a thin layer of chocolate between the crust and coconut topping. Dark, milk, or white chocolate all pair wonderfully with the coconut flavor.
- → How do I prevent the crust from getting soggy?
To keep your crust crisp, be sure to partially bake it before adding the topping. This creates a barrier that helps prevent the wet filling from soaking in. Don't let the crust cool completely before adding the topping – adding the coconut mixture while the crust is still warm helps create a good seal between layers.