
 Bookmark
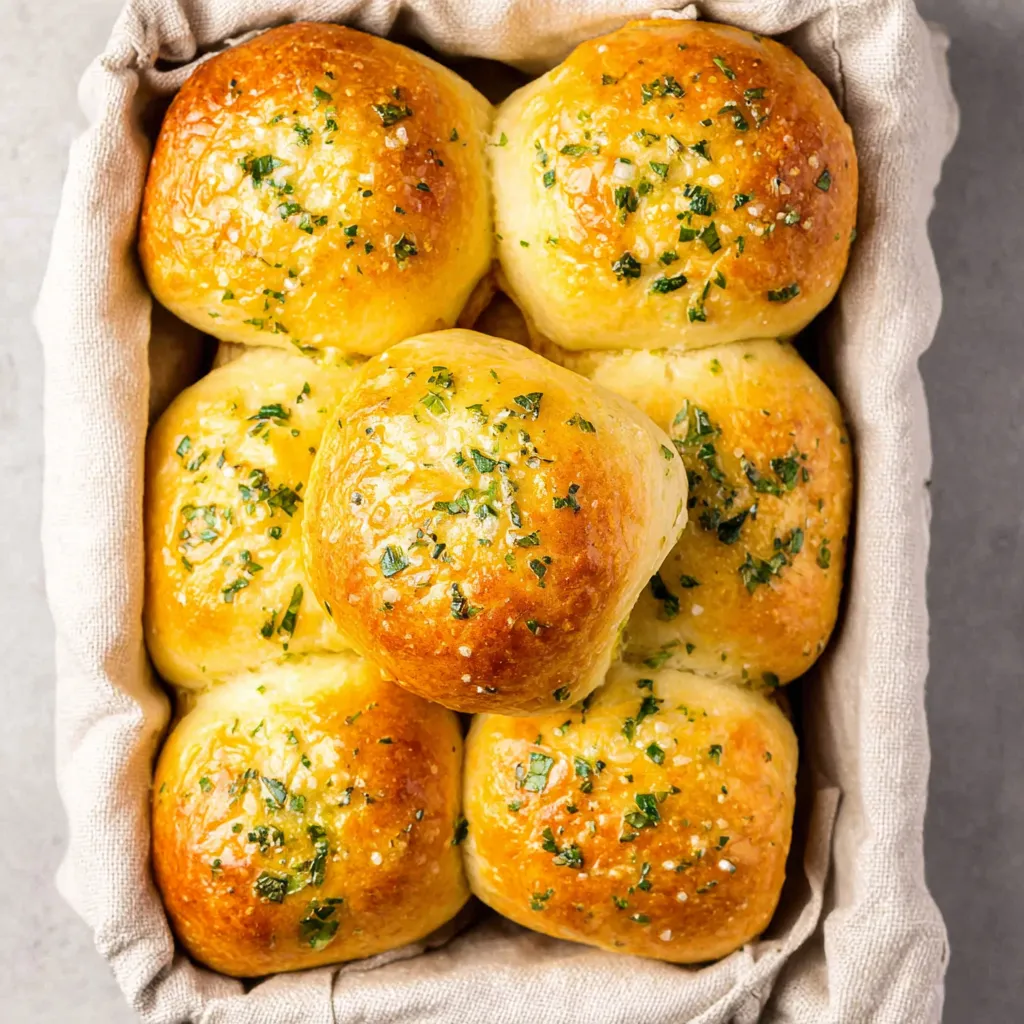
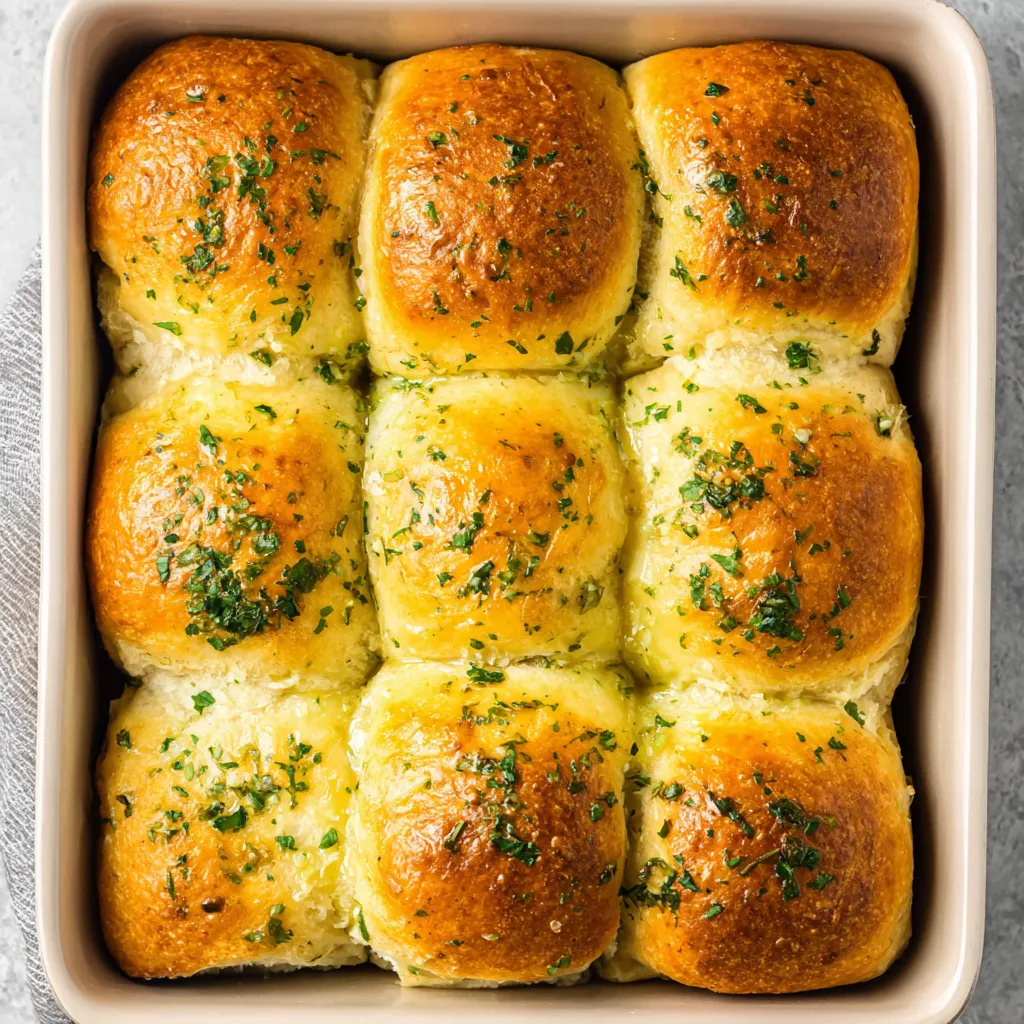
This garlic bread rolls recipe transforms ordinary dinner rolls into an extraordinary garlic-infused delight that will make your kitchen smell heavenly. The soft, fluffy texture paired with intense garlic flavor creates an irresistible side dish perfect for any meal.
I first created these rolls for a Sunday family dinner when I wanted something more special than store-bought bread. The moment my family tasted them still warm from the oven, they declared them a mandatory addition to all future gatherings.
Ingredients
- All-purpose flour properly measured using the spoon-level method to ensure the perfect texture
- Fresh garlic provides that unmistakable aromatic flavor that dried versions simply cannot match
- Fresh parsley adds bright color and a subtle herbaceous note that balances the rich garlic butter
- Instant yeast speeds up the rising process compared to active dry yeast
- Whole or 2% milk creates a tender crumb structure superior to water-based dough
- Unsalted butter allows you to control the salt level while providing necessary richness
- Flaky sea salt as a finishing touch creates delightful textural contrast and flavor bursts
Step-by-Step Instructions
- Prepare the Pan
- Butter your 9x13 baking dish thoroughly to prevent sticking. This step is crucial for easy removal after baking.
- Create Garlic Butter Base
- Melt butter in a small pot and add minced garlic, cooking just until fragrant around 1-2 minutes. Avoid browning the garlic which can become bitter. Allow this mixture to cool while gathering remaining ingredients.
- Mix The Dough
- Combine flour, parsley, sugar, yeast and salt in your mixing bowl before adding the warmed milk, egg, and cooled garlic butter. Knead until smooth and slightly tacky, approximately 10-12 minutes. The dough should feel soft but manageable.
- Shape The Rolls
- Divide dough into 12 equal portions weighing about 67 grams each for consistency. Shape each portion into a smooth ball by creating surface tension, pinching the bottom seam to secure. Arrange rolls in your prepared pan with even spacing.
- First Rise
- Cover rolls with plastic wrap or a clean kitchen towel and place in a warm, draft-free area until doubled in size, typically 1-2 hours depending on your kitchen temperature. Look for visual cues rather than strictly timing this step.
- Bake To Golden Perfection
- Brush rolls with beaten egg wash for a beautiful shine, then bake at 350°F until tops are golden brown, about 20-30 minutes. The internal temperature should reach approximately 190°F for perfectly baked rolls.
- Apply Finishing Garlic Butter
- While rolls bake, prepare the second garlic butter by melting butter with minced garlic, then adding fresh parsley off heat. Brush this aromatic mixture over hot rolls immediately after baking, allowing it to soak into the warm bread.
 Bookmark
My absolute favorite moment with these rolls happened during a dinner party when a self-proclaimed bread hater took one bite and immediately asked for the recipe. The aroma alone converted him before he even tasted them.
Troubleshooting Sticky Dough
Sticky dough is the number one challenge when making these rolls. If your dough feels too wet after kneading for 5 minutes, add flour one tablespoon at a time. Be patient and avoid adding too much flour at once which will create dense rolls. Humidity levels in your kitchen greatly affect dough consistency so trust your hands over exact measurements. The dough should feel tacky but not stick aggressively to your fingers.
Make-Ahead Options
These rolls fit beautifully into busy schedules. Shape the rolls the evening before and place them in your buttered pan. Cover tightly with plastic wrap and refrigerate overnight. The next morning, remove from refrigerator and allow to come to room temperature and complete their rise before baking. This slow fermentation actually enhances flavor complexity. Alternatively, freeze fully baked rolls for up to a month and reheat wrapped in foil at 350°F for the perfect last-minute side dish.
Serving Suggestions
These garlic bread rolls shine alongside pasta dishes like lasagna or spaghetti, but they also elevate simple soups and stews to special-occasion status. Try splitting leftover rolls and making mini sandwiches with sliced meatballs and marinara. For brunch, slice rolls horizontally and use as the base for savory egg sandwiches. The versatility extends to appetizers too—pull apart small pieces and serve with herbed olive oil for dipping.
Recipe FAQs
- → Can I make these garlic bread rolls ahead of time?
Yes! After shaping the rolls and placing them in the baking pan, cover tightly with plastic wrap and refrigerate overnight. The next day, allow them to come to room temperature and double in size (usually 2-3 hours) before baking according to the instructions. Alternatively, you can fully bake them, cool completely, and freeze for up to one month in an airtight container.
- → What's the best way to reheat these rolls?
For the best texture and flavor, cover the rolls with foil and warm them in a 350°F oven until heated through. For a quicker option, microwave individual rolls for 20-30 seconds. Either method will restore that fresh-baked warmth that makes these rolls special.
- → Can I use active dry yeast instead of instant yeast?
Yes, but you'll need to modify the process slightly. Mix the active dry yeast with the warm milk (110°F) and a sprinkle of sugar, then let it sit for 5 minutes until foamy. After kneading the dough, allow it to rise until doubled in size (30-60 minutes) before shaping into rolls.
- → Why is my dough too sticky to work with?
Dough consistency can vary based on humidity, flour measuring technique, and other factors. If your dough feels too sticky, add flour one tablespoon at a time until it becomes workable. Ideally, the dough should feel soft and slightly tacky but not stick aggressively to your fingers. Using a kitchen scale to measure flour (as recommended in the recipe notes) helps achieve consistent results.
- → How can I ensure my garlic doesn't burn when making the garlic butter?
Cook the garlic in melted butter over medium-low heat for just 1-2 minutes until fragrant. Remove from heat immediately once you smell the garlic aroma developing. Burned garlic becomes bitter, so it's better to undercook slightly than risk burning. The residual heat from the melted butter will continue cooking the garlic gently.
- → Can I add cheese to these garlic bread rolls?
Absolutely! For a cheesy variation, you can add 1/2 cup of grated parmesan or shredded mozzarella to the dough during mixing. Alternatively, sprinkle cheese on top of the rolls during the last 5 minutes of baking for a golden, cheesy crust. Both options complement the garlic flavor beautifully.