
 Bookmark
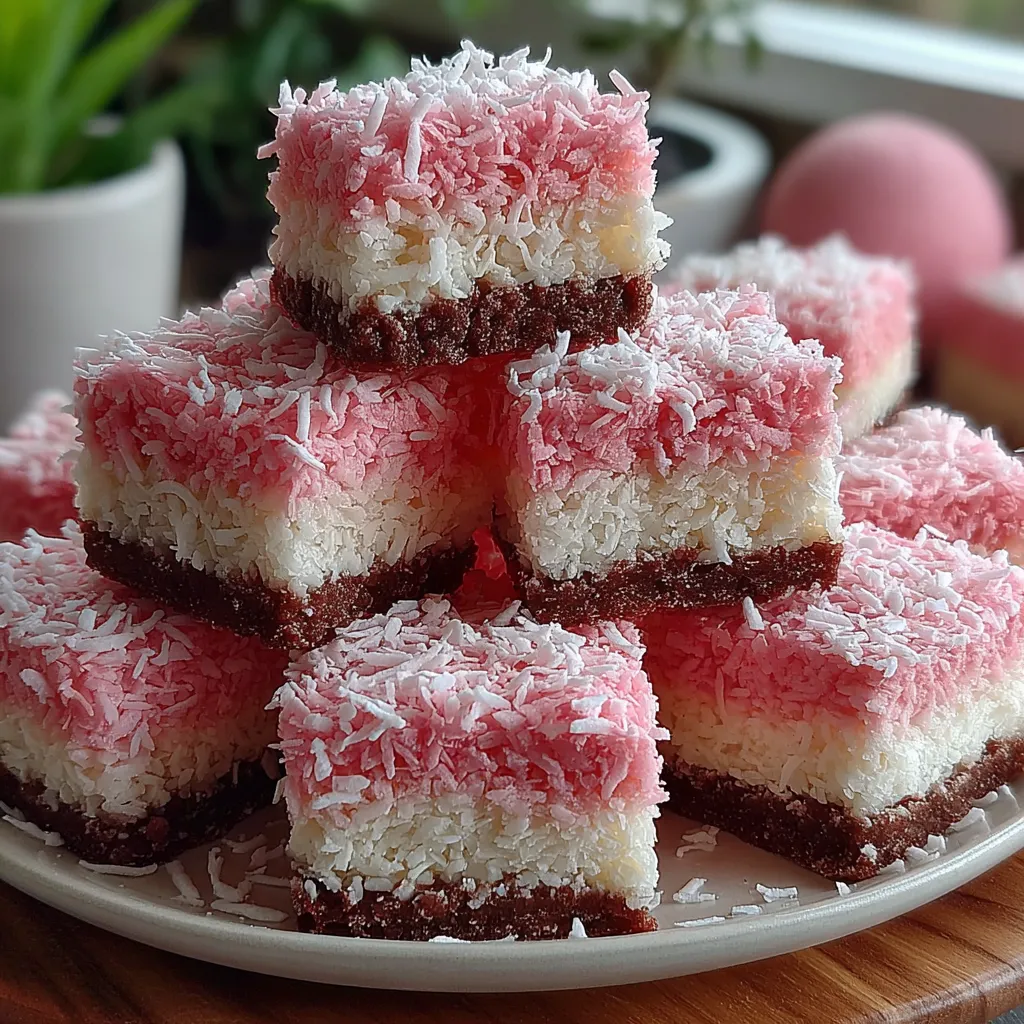
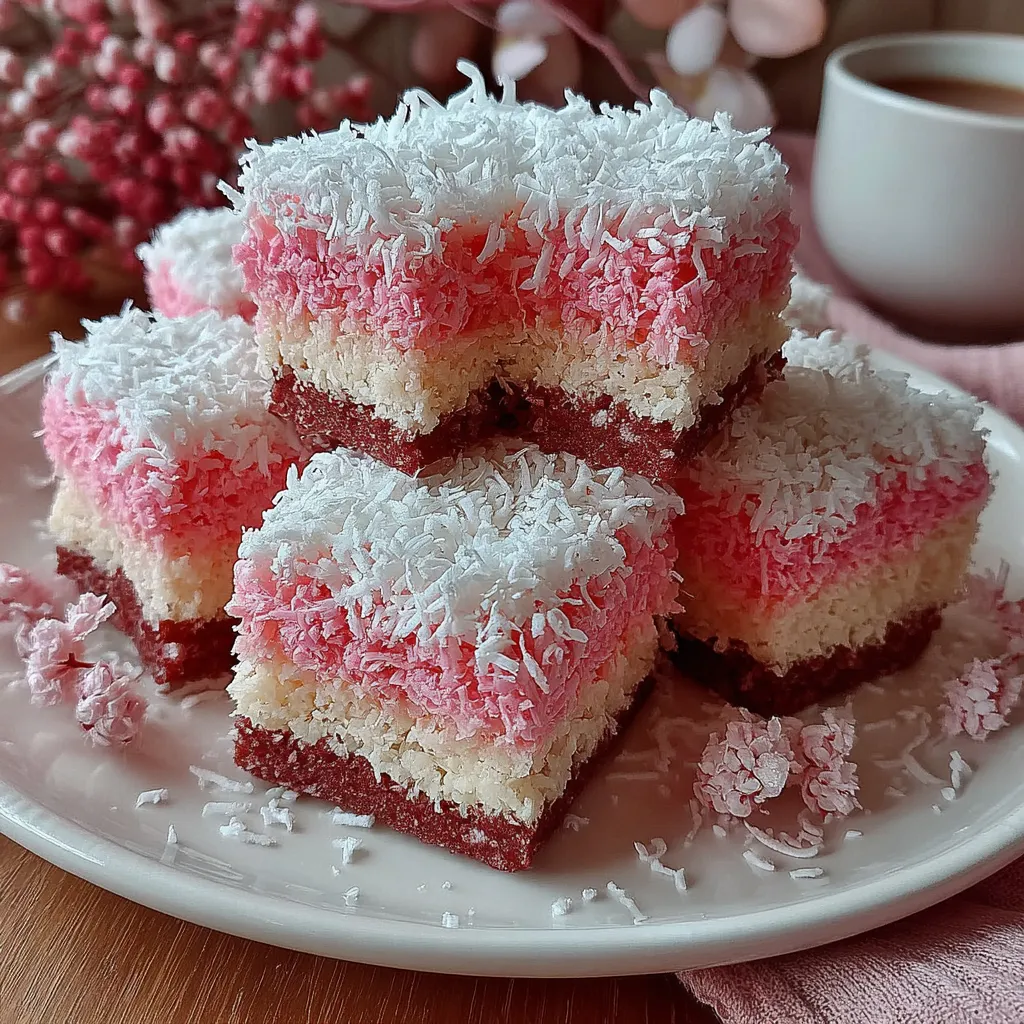
This moist and colorful cake bar has been my favorite dessert to bring to spring gatherings for years. The perfect balance between rich chocolate base and fluffy pink coconut topping never fails to impress both kids and adults alike.
I first made these for my daughter's ballet recital party. The girls were delighted by the pink topping, and the parents couldn't stop asking for the recipe. Now it's requested at every family gathering no matter the season.
Ingredients
- All purpose flour creates the perfect cake structure and tender crumb
- Cocoa powder use Dutch processed for a deeper chocolate flavor if available
- Baking powder and baking soda work together for the ideal rise
- Salt enhances all flavors especially the chocolate always include it
- Unsalted butter softened at room temperature for about 30 minutes
- Granulated sugar look for pure cane sugar for best results
- Large eggs at room temperature for better incorporation
- Vanilla extract use pure not imitation for authentic flavor
- Buttermilk adds tenderness and moisture to the cake
- Hot water dissolves cocoa powder and creates a silky batter
- Heavy whipping cream should be very cold for proper whipping
- Powdered sugar sifted to prevent lumps in your frosting
- Cream cheese optional but creates a more stable frosting especially for warmer days
- Shredded coconut sweetened creates the signature snowball effect
- Pink food coloring gel colors work better than liquid for vivid results
- Milk only needed if your coconut is particularly dry
Step-by-Step Instructions
- Preheat and Prepare
- Set your oven to 350°F and prepare your baking pan. Use parchment paper with overhang on the sides to create handles for easy removal later. The parchment prevents any sticking and makes cleanup easier too.
- Mix Dry Ingredients
- Combine flour, cocoa, baking powder, baking soda and salt in a bowl. Whisk thoroughly for at least 30 seconds to ensure even distribution of leavening agents. This step prevents bitter spots in your finished cake.
- Cream Butter and Sugar
- Beat softened butter and sugar until the mixture becomes notably lighter in color and fluffy in texture. This takes about 3 minutes with an electric mixer. This step incorporates air which helps create a tender cake structure.
- Add Wet Ingredients
- Incorporate eggs one at a time, beating well after each addition. Add vanilla extract. The mixture should look smooth and creamy. This gradual addition prevents curdling and ensures proper emulsion.
- Combine Batters
- Alternate adding dry ingredients and buttermilk to the butter mixture, beginning and ending with dry ingredients. Mix just until combined after each addition. Overmixing activates gluten and toughens cake.
- Add Hot Water
- Stir in hot water until batter is smooth. The batter will appear quite thin, but this is correct. The hot water blooms the cocoa powder, intensifying the chocolate flavor in the final cake.
- Bake the Cake
- Pour batter into prepared pan and bake for 25 to 30 minutes. The cake is done when a toothpick inserted in the center comes out with a few moist crumbs but no wet batter. Allow to cool completely before frosting.
- Prepare Frosting
- Whip cream cheese until smooth if using. Add heavy cream, powdered sugar and vanilla, beating until soft peaks form. The frosting should hold its shape but remain spreadable. For stability, chill the bowl beforehand.
- Color Coconut
- Place coconut in a bowl and add pink food coloring. Mix with clean hands or a fork until color is evenly distributed. If coconut seems dry, sprinkle with a small amount of milk to help the color adhere better.
- Assemble Bars
- Spread frosting evenly over the completely cooled cake. Sprinkle pink coconut over the entire surface, pressing gently so it adheres to the frosting. Work from the edges toward the center to minimize mess.
- Chill and Slice
- Refrigerate the assembled cake for at least one hour before cutting. Use a sharp knife dipped in hot water and wiped clean between cuts for the cleanest edges. Wipe the knife between each cut for professional looking bars.
 Bookmark
My favorite part of this recipe is watching people's reactions when they first see the vibrant pink topping. My grandmother who rarely gets excited about "fancy desserts" always takes an extra bar home wrapped in a napkin. The contrast between the dark chocolate cake and pink coconut creates such a delightful visual that even before tasting, everyone is already smiling.
Storage Tips
These bars keep exceptionally well in the refrigerator for up to 5 days if stored properly. Place them in an airtight container with parchment paper between layers to prevent sticking. The flavor actually improves after the first day as the moisture from the frosting slightly infuses into the cake layer.
For longer storage, these freeze beautifully. Wrap individual portions in plastic wrap and then place in a freezer bag. When ready to enjoy, thaw in the refrigerator overnight rather than at room temperature to maintain the texture of both the frosting and coconut topping.
Ingredient Substitutions
If buttermilk isn't available, make your own by adding 1/2 tablespoon of lemon juice or vinegar to regular milk and letting it sit for 5 minutes. The slight acidity activates the baking soda properly.
For a dairy-free version, replace butter with coconut oil and use coconut cream instead of heavy whipping cream for the frosting. The coconut flavor actually enhances the overall profile of the dessert.
Those avoiding artificial colors can create pink coconut using natural options like beet powder, freeze-dried strawberry powder, or even cranberry juice. Start with a small amount and increase until you achieve your desired shade.
Serving Suggestions
These bars shine when served slightly chilled on a warm day. The temperature contrast between the cool, creamy topping and the rich cake base creates a wonderful sensory experience.
For a complete dessert plate, add a small scoop of vanilla ice cream on the side and a few fresh berries for color contrast. The berries add a pleasant tartness that balances the sweetness of the cake.
During holiday seasons, adjust the coconut color to match your celebration. Green for St. Patrick's Day, pastel colors for Easter, or red and white for Valentine's Day or Christmas create a versatile dessert that works year-round.
Recipe FAQs
- → How do I get the perfect pink color for the coconut topping?
Start with just 2-3 drops of pink food coloring and mix thoroughly with the shredded coconut. If you need a more vibrant color, add one drop at a time until you reach your desired shade. Adding a tablespoon of milk helps distribute the color more evenly if the coconut seems dry. For natural coloring, you could use beetroot powder or raspberry juice instead of artificial food coloring.
- → Can I make these bars without the cream cheese in the frosting?
Absolutely! The cream cheese is optional and primarily adds stability to the whipped cream frosting. If omitting it, simply whip the heavy cream with powdered sugar and vanilla until it forms stiff peaks rather than soft peaks. This will help the frosting maintain its structure. You might want to refrigerate the bars longer before serving to ensure the frosting sets properly.
- → How far in advance can I prepare these cake bars?
These bars actually benefit from being made a day ahead! The flavors meld beautifully overnight in the refrigerator. You can prepare them up to 2 days in advance and keep them covered in the refrigerator. For longer storage, they can be frozen for up to 3 months - just thaw overnight in the refrigerator before serving.
- → Why is hot water added to the chocolate cake batter?
The hot water serves several important purposes in chocolate cake batter. It helps bloom and dissolve the cocoa powder, intensifying the chocolate flavor. It also creates a thinner batter that results in a more moist and tender cake. This technique is common in many chocolate cake recipes because it helps develop that rich, deep chocolate flavor that makes the base of these bars so delicious.
- → Can I make a gluten-free version of these bars?
Yes! Simply substitute the all-purpose flour with a 1:1 gluten-free flour blend designed for baking. Look for blends that contain xanthan gum to help with structure. The rest of the ingredients are naturally gluten-free. Just be sure to check your cocoa powder and other packaged ingredients to confirm they haven't been processed with gluten-containing products if you're preparing for someone with celiac disease or severe gluten sensitivity.
- → What's the best way to cut these bars neatly?
For clean, professional-looking cuts, chill the bars thoroughly first (at least 2 hours). Use a large, sharp knife and wipe it clean with a warm, damp cloth between each cut. For extra precision, you can measure and mark the top with small indentations before cutting. Some bakers even use a ruler to ensure perfectly even portions. If the knife sticks, dipping it in hot water and wiping it dry between cuts can also help.