
 Bookmark
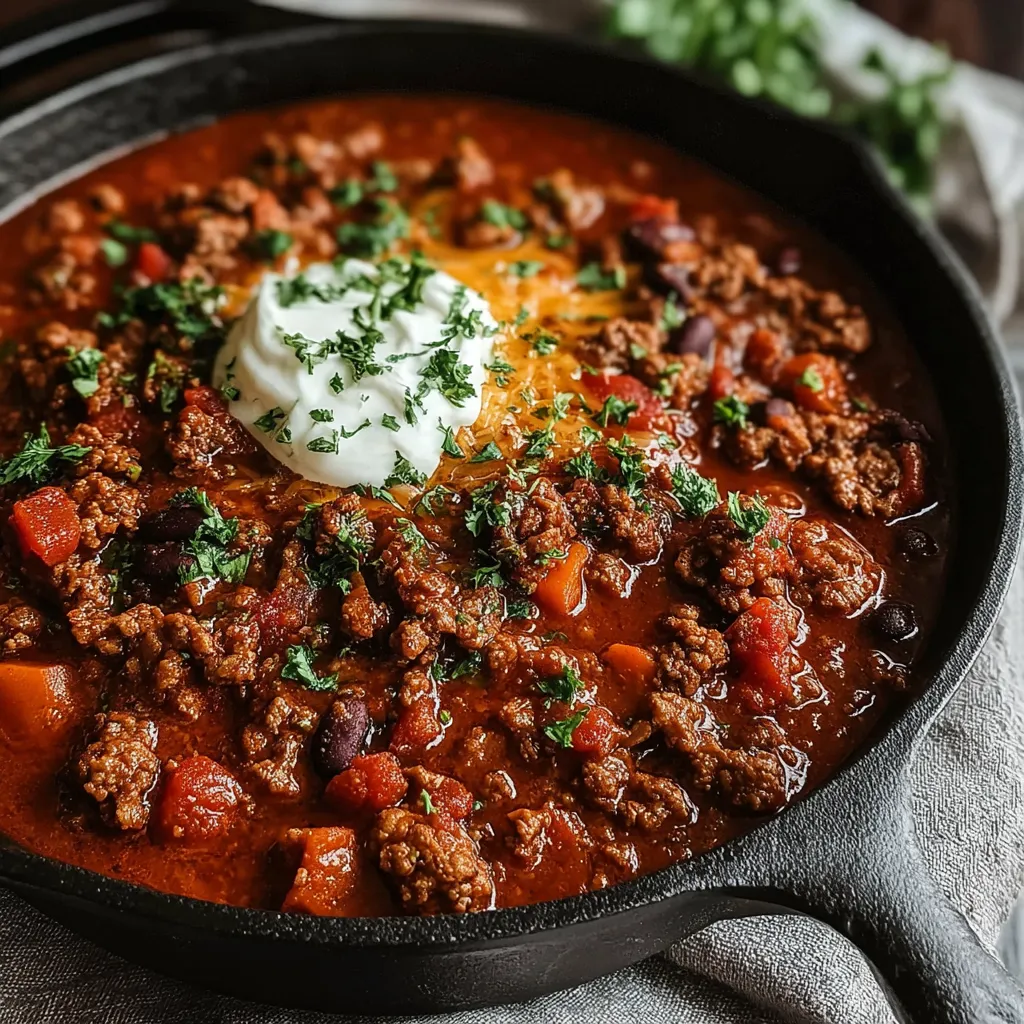
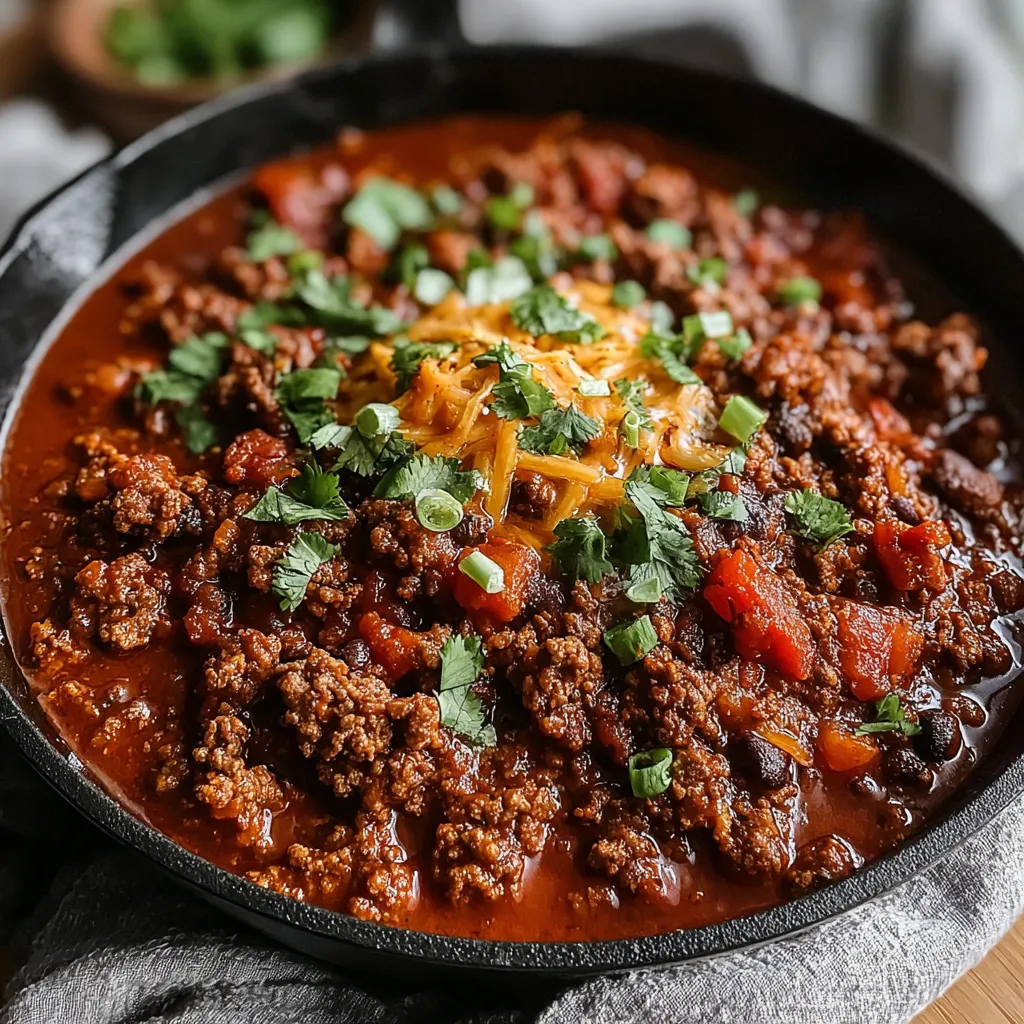
This hearty stovetop chili with ground beef has been my winter comfort food for years, perfect for those chilly evenings when you need something warming and satisfying. The combination of tender ground beef, savory beans, and a perfectly balanced spice blend creates a chili that's both traditional and memorable.
I first created this recipe during a particularly cold winter when my family was craving something comforting but substantial. It's now become our Sunday tradition during football season, with everyone customizing their bowl with different toppings.
Ingredients
- Ground beef provides that essential rich meaty flavor and hearty texture look for 80/20 beef for the best flavor balance
- Onion and garlic create the aromatic foundation that makes this chili so flavorful choose firm onions with no soft spots
- Diced tomatoes add brightness and acidity to balance the richness of the beef
- Kidney beans and black beans offer contrasting textures and boost protein content rinse well to remove excess sodium
- Tomato paste thickens the chili and intensifies the tomato flavor stir it in thoroughly to avoid clumps
- Chili powder is the signature flavor use fresh spices for the best taste
- Cumin and smoked paprika add depth and complexity without overwhelming the palate
- Beef broth creates a rich base that ties all flavors together homemade is best but quality store bought works well
Step-by-Step Instructions
- Sauté the Aromatics
- Heat olive oil in a large pot over medium high heat until shimmering then add diced onion cooking for 3 to 4 minutes until translucent and soft stirring occasionally to prevent browning
- Bloom the Garlic
- Add minced garlic to the softened onions and cook for just 1 to 2 minutes until fragrant be vigilant as garlic burns quickly and will turn bitter if overcooked
- Brown the Beef
- Add ground beef to the aromatics breaking it into small pieces with a wooden spoon cook for 5 to 7 minutes until no longer pink drain excess fat if needed leaving just enough for flavor
- Develop the Spice Base
- Sprinkle all spices over the meat and vegetable mixture stirring continuously for 1 to 2 minutes allowing the heat to release the essential oils in the spices which dramatically enhances their flavor
- Create the Tomato Base
- Add tomato paste and cook for 2 to 3 minutes stirring constantly this caramelizes the tomato paste adding a deeper richer flavor to the final dish
- Build the Broth
- Pour in diced tomatoes and beef broth stirring to combine while scraping any flavorful bits from the bottom of the pot bring to a simmer then reduce heat to medium low allowing it to cook uncovered for 20 to 25 minutes stirring occasionally as it thickens
- Incorporate the Beans
- Gently stir in both varieties of drained and rinsed beans allowing the chili to simmer for another 10 to 15 minutes giving the beans time to absorb the surrounding flavors without breaking down
- Final Seasoning
- Taste and adjust seasoning adding more salt pepper or spices as needed this is also the time to adjust consistency by adding more broth if the chili is thicker than you prefer
 Bookmark
My secret ingredient is actually patience. I've found that allowing the chili to simmer gently rather than rushing the process makes all the difference in developing those deep complex flavors. My grandmother taught me that good chili should never be rushed, and she was absolutely right.
Topping Suggestions
This chili becomes a customizable feast with the right toppings. I always set out a spread of shredded cheddar cheese, sour cream, diced avocado, sliced jalapeños, chopped cilantro, and lime wedges. My children love creating their own unique combinations, and it's fascinating to see how everyone's preferences differ. For an extra special touch, try serving it with a side of freshly baked cornbread with honey butter.
Make-Ahead and Storage Tips
This chili actually tastes better the next day after the flavors have had time to meld together. To store leftover chili, let it cool completely then transfer to airtight containers. It will keep in the refrigerator for up to 4 days. For longer storage, portion the chili into freezer safe containers leaving some room for expansion. Properly frozen chili maintains its quality for up to 3 months. When reheating, add a splash of beef broth if needed to restore the original consistency.
Ingredient Substitutions
This recipe is incredibly flexible and can accommodate many dietary preferences. For a leaner option, substitute ground turkey or chicken for the beef, though you may want to add a tablespoon of olive oil for richness. Plant based eaters can use a meat substitute or simply add an extra can of beans and some chopped mushrooms for a hearty texture. If you're out of kidney beans, pinto beans make an excellent substitute. For those avoiding tomatoes, try using roasted red pepper puree mixed with a bit of beef broth as an alternative base.
The History Behind the Bowl
Chili has deep roots in American cuisine, particularly in the Southwest. The dish as we know it today likely originated with Texas cowboys in the 1800s, who created portable, hearty meals over campfires. Traditional Texas chili often contained no beans at all just meat, peppers, and spices. As the dish traveled north and east across America, regional variations developed, including the addition of beans, different types of meat, and varying spice profiles. This recipe represents a modern family friendly version that balances authentic flavors with convenient preparation.
Recipe FAQs
- → Can I make this chili in a slow cooker instead?
Yes! Brown the beef, onions and garlic first, then transfer everything to a slow cooker. Add the remaining ingredients except the beans and cook on low for 6-8 hours or high for 3-4 hours. Add the beans during the last 30 minutes of cooking time.
- → How can I make this chili spicier?
To increase the heat level, add more cayenne pepper, include diced jalapeños with the onions, use fire-roasted tomatoes instead of regular diced tomatoes, or stir in some hot sauce at the end. You can also serve with sliced fresh jalapeños on top.
- → What are good toppings for this chili?
Classic toppings include shredded cheddar cheese, sour cream, diced avocado, sliced green onions, fresh cilantro, crushed tortilla chips, or a squeeze of lime juice. These add extra flavor dimensions and different textures to each bowl.
- → Can I use different types of meat?
Absolutely! Ground turkey or chicken works well for a lighter option, while ground pork adds richness. For extra depth, try a 50/50 mix of ground beef and Italian sausage. You could also use plant-based ground meat alternatives for a vegetarian version.
- → How long will leftover chili keep in the refrigerator?
Leftover chili can be stored in an airtight container in the refrigerator for 3-4 days. The flavor often improves after a day as the spices meld together. Reheat thoroughly on the stovetop or in the microwave before serving.
- → Can this chili be frozen?
Yes, this chili freezes exceptionally well! Let it cool completely, then store in freezer-safe containers or heavy-duty freezer bags for up to 3 months. Thaw overnight in the refrigerator before reheating on the stovetop, adding a splash of broth if needed to adjust consistency.