
 Bookmark
This hearty Marshmallow Rice Krispies Halloween Brains recipe transforms simple ingredients into a deliciously gruesome centerpiece for any Halloween gathering. The combination of gooey marshmallows and crispy cereal creates the perfect texture for molding these realistic looking brains that will both delight and disgust your guests.
I first created these brain treats for my nephew's science-themed birthday party. The children were simultaneously horrified and fascinated by the realistic appearance, and within minutes they were all covered in sticky marshmallow and red food coloring as they devoured their "zombie snack."
Ingredients
- Unsalted butter Creates a smooth base and prevents sticking. Always use unsalted to control flavor precisely.
- Regular marshmallows Acts as the primary binding agent. Look for fresh ones that feel soft when gently squeezed.
- Rice Krispies cereal Provides the essential crispy texture. The name brand truly does work better than generic versions.
- Salt Enhances the sweetness and creates flavor balance. Fine sea salt dissolves most evenly.
- Red food coloring Creates the realistic brain effect. Gel food coloring works best for vibrant color without adding excess moisture.
Step-by-Step Instructions
- Create Your Bain Marie Setup
- Fill a medium saucepan with about half cup water and bring to a gentle boil. Place your heatproof bowl over the pot making sure the bottom doesn't touch the water. This gentle heating method prevents scorching and creates that perfectly smooth texture we need for properly formed brains.
- Melt The Marshmallow Base
- Add butter and marshmallows to your heatproof bowl positioned over the simmering water. Continuously whisk the ingredients using steady circular motions for about 2 to 4 minutes. Watch as the marshmallows gradually transform into a glossy cohesive paste that will become the foundation of our brain matter.
- Add Color And Seasoning
- Carefully remove the bowl from the heat source using oven mitts. Immediately whisk in the salt to enhance the overall sweetness perception. Next add 2 to 3 drops of red food coloring starting conservatively. The mixture should have a slight pinkish tinge at this stage not deep red.
- Combine With Rice Krispies
- Pour the warm marshmallow mixture over the Rice Krispies in a large mixing bowl. Work quickly but thoroughly ensuring every piece gets coated evenly. Listen for the distinctive snap crackle pop that lets you know your cereal is still crisp. The mixture should hold together when pressed but not feel overly sticky.
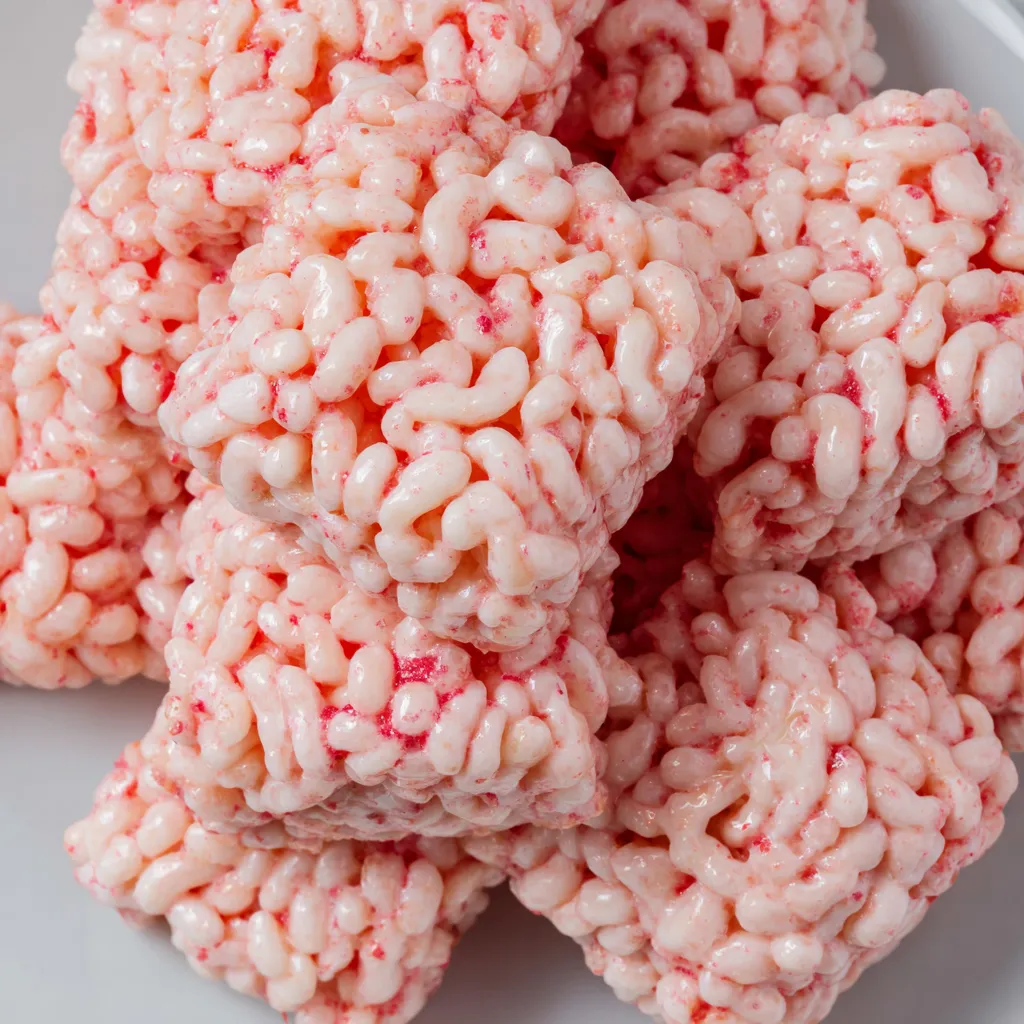
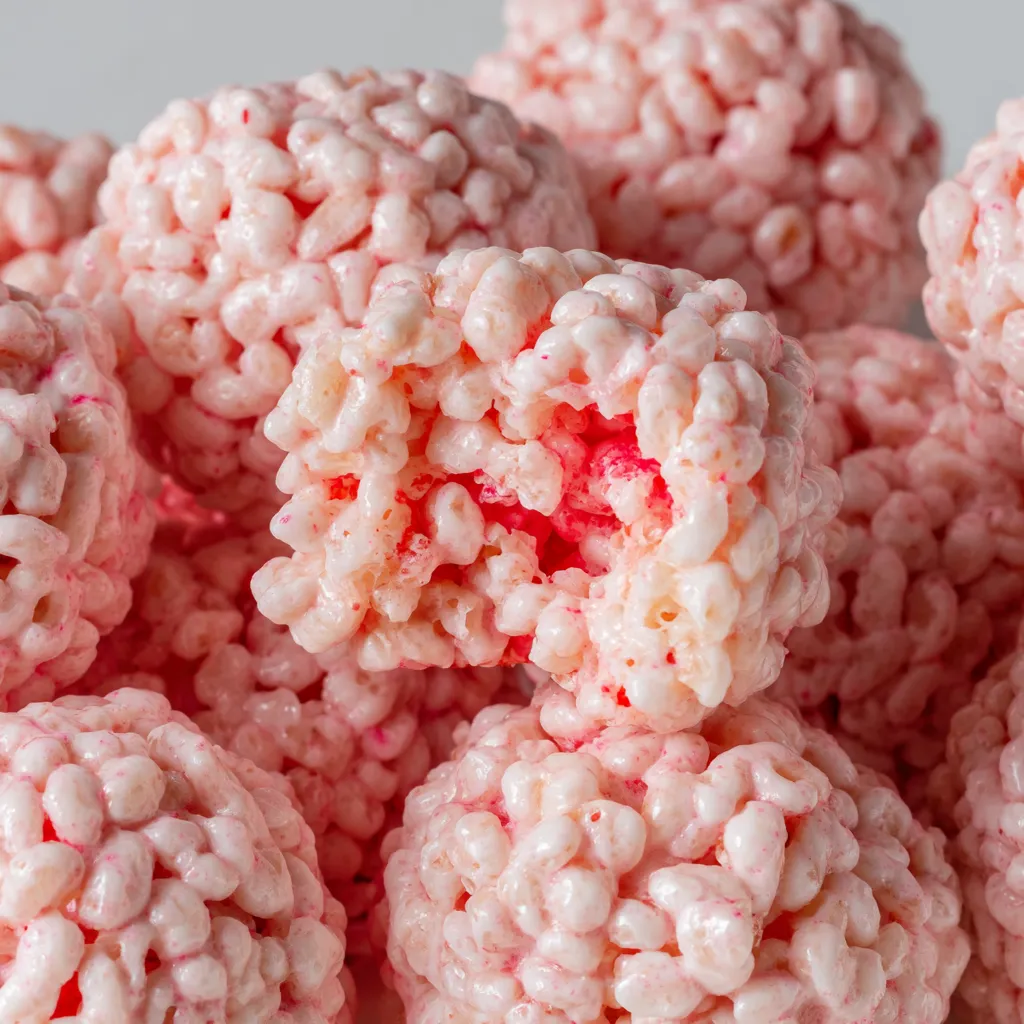
- Shape Your Halloween Brains
- Lightly oil your hands to prevent sticking. Grab portions roughly the size of a tennis ball and shape them into oval brain forms. Using a butter knife create the characteristic brain groove down the center. Finally dip a toothpick in red food coloring and draw realistic vein patterns across the surface for that fresh brain look.
 Bookmark
The red food coloring is truly the magical ingredient that transforms these treats from ordinary to extraordinary. I once made a batch without the veining effect and my daughter simply said they looked like "boring rice krispie treats." But with those delicate red lines they become conversation starters that people almost hesitate to eat before snapping photos for social media.
Storage Strategy
These spooky brains maintain their best texture when stored at room temperature in an airtight container. They'll stay fresh for about 5 to 7 days though I doubt they'll last that long once people discover them.
For longer storage they can be refrigerated for up to two weeks but may become slightly firmer than ideal. If making far in advance they can even be frozen for 2 to 3 months wrapped individually in plastic and placed in freezer bags. Allow them to thaw completely at room temperature before serving.
Interestingly these Halloween brain treats actually improve in flavor after 24 hours as the ingredients meld together creating a more complex sweetness. This makes them perfect for preparing a day ahead of your Halloween gathering.
Creative Variations
The basic recipe provides a perfect canvas for customization. For chocolate lovers add mini chocolate chips throughout the mixture to represent neurons. The chips will partially melt creating gooey pockets of chocolate within the cerebral matter.
For a more complex flavor profile replace 2 tablespoons of butter with peanut butter. This adds a nutty dimension that appeals to adult palates while maintaining the visual appeal. A half teaspoon of vanilla extract also enhances the overall flavor depth.
If your Halloween theme leans more toward pumpkins than zombies simply substitute orange food coloring for the red. The resulting treats look like miniature pumpkins especially when you add a small pretzel stick at the top to represent the stem.
Serving Suggestions
These spooky brain treats create maximum impact when displayed on a dark platter or serving board. Consider arranging them on a black slate cheese board with small tags identifying them as "Freshly Harvested Brains" or "Zombie Snacks."
For a complete horror themed dessert table pair these with blood red velvet popcorn chocolate covered "fingers" and eyeball cake pops. The variety of textures and similarly grotesque appearance creates a cohesive and memorable spread.
For adult Halloween celebrations serve alongside spiked hot apple cider or pumpkin flavored cocktails. The sweet crunchy texture provides an excellent contrast to spiced beverages creating a balanced tasting experience that guests will remember long after the holiday.
Recipe FAQs
- → How do I prevent the marshmallow mixture from sticking to my hands?
Lightly coat your hands with vegetable oil or cooking spray before shaping the brains. This creates a barrier between your skin and the sticky mixture. Reapply as needed throughout the shaping process for easier handling.
- → Can I make these ahead of time for a Halloween party?
Absolutely! These treats can be made 3-5 days in advance and stored in an airtight container at room temperature. For the most vivid appearance, add the red 'blood vessel' details the day of your event.
- → What's the best way to create realistic brain details?
After shaping the basic oval form, use a butter knife to create a deep central groove dividing the hemispheres. Then use a toothpick dipped in red food coloring to draw squiggly vein patterns across the surface, concentrating on the creases for the most realistic effect.
- → Can I use different colors for more dramatic effects?
Yes! Try green food coloring for zombie brains, purple for alien brains, or orange for a more subtle Halloween look. You can also use a combination of colors - start with a pale base color and then add contrasting veins.
- → Are there any allergen-free alternatives for these treats?
You can substitute the butter with coconut oil or dairy-free margarine, and use vegan marshmallows for a dairy-free version. For gluten-free diets, verify your Rice Krispies are certified gluten-free or substitute with another gluten-free puffed rice cereal.
- → How can I get the perfect brain consistency?
The key is proper marshmallow melting and timing. If your mixture seems too loose, add more cereal. If it's too stiff and won't shape well, you may have cooked the marshmallows too long or let the mixture cool too much before shaping.