
 Bookmark
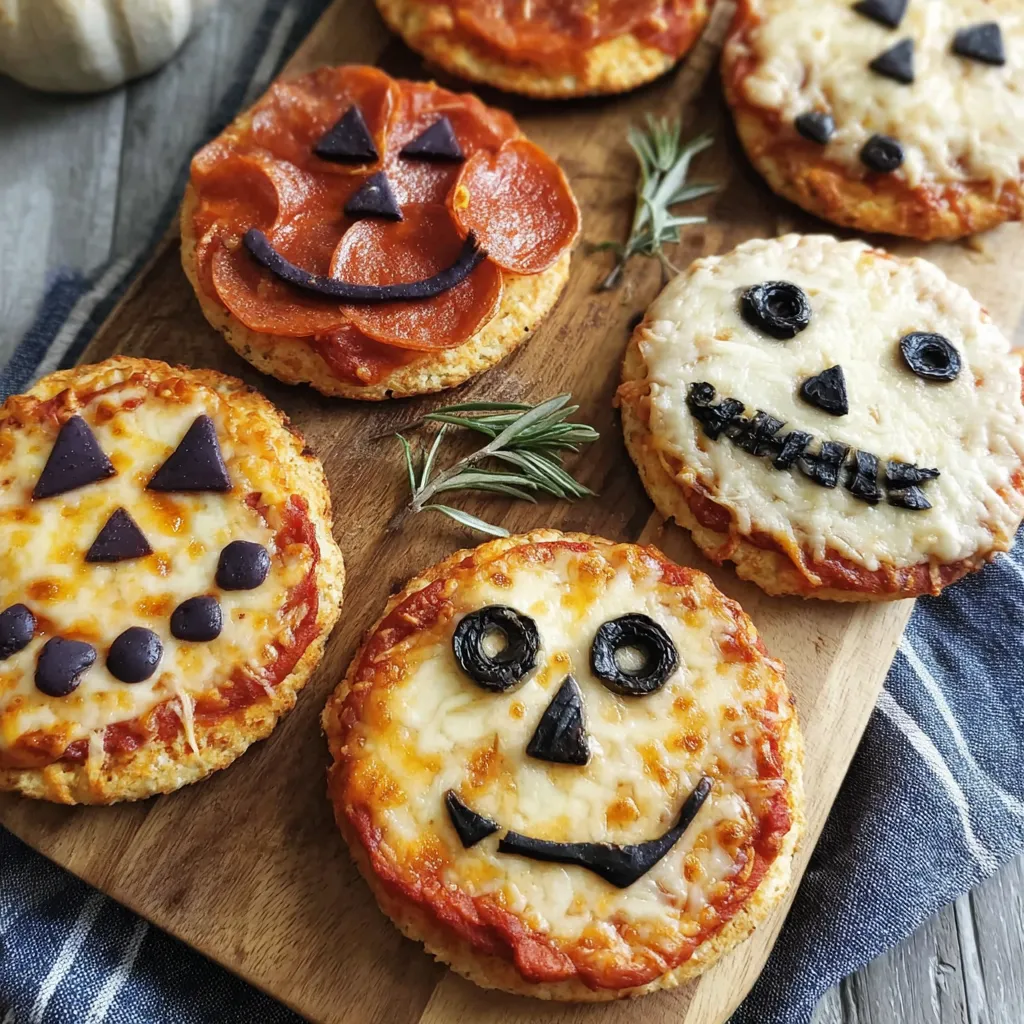
This hearty mini pizza recipe transforms simple ingredients into a spooky Halloween feast that delights both kids and adults alike. The combination of creamy cheese, tangy sauce, and creative toppings creates festive treats that are as fun to make as they are to eat.
I first made these for my nephew's Halloween party when the planned caterer canceled last minute. What started as a panic solution turned into our most requested holiday tradition, with the kids now planning their pizza monster designs weeks in advance.
Ingredients
- Mini Pizza Crusts personalize your pizzas with store bought bases or make your own for extra flavor
- Pizza Sauce choose a chunky variety for better texture and less sogginess on your pizzas
- Mozzarella Cheese the classic stretchy cheese that creates the perfect gooey base for your designs
- Black Olives these provide the perfect contrast for spider bodies and spooky eyes
- Mini Pepperoni adds a pop of color and savory flavor to your monstrous creations
- Orange & Green Bell Peppers these bright vegetables create jack o lantern features and add nutritional value
- Part Skim String Cheese the secret ingredient that tears perfectly for creating mummy wrappings
- Fresh Basil adds a bright finish and contrasts beautifully with the darker toppings
- Olive Oil Spray ensures your pizzas don't stick while adding minimal calories
Step-by-Step Instructions
- Prepare Your Oven
- Preheat your oven to 425°F to ensure it reaches optimal pizza cooking temperature. While waiting, lightly mist your baking sheet with olive oil spray to prevent sticking and help achieve that perfectly crisp crust.
- Create Your Base
- Take each mini pizza crust and spread 1 to 2 tablespoons of pizza sauce in a circular motion, working from the center outward. Leave a small border around the edge to create a crust that can be easily held. The sauce should be evenly distributed but not too thick to prevent soggy centers.
- Add Cheese Foundation
- For half your pizzas, sprinkle a generous layer of shredded mozzarella to create a base for other designs. For the mummy pizzas, lay down pulled strips of string cheese in a crisscross pattern, leaving a small gap in the middle where you can later add olive eyes.
- Craft Spooky Designs
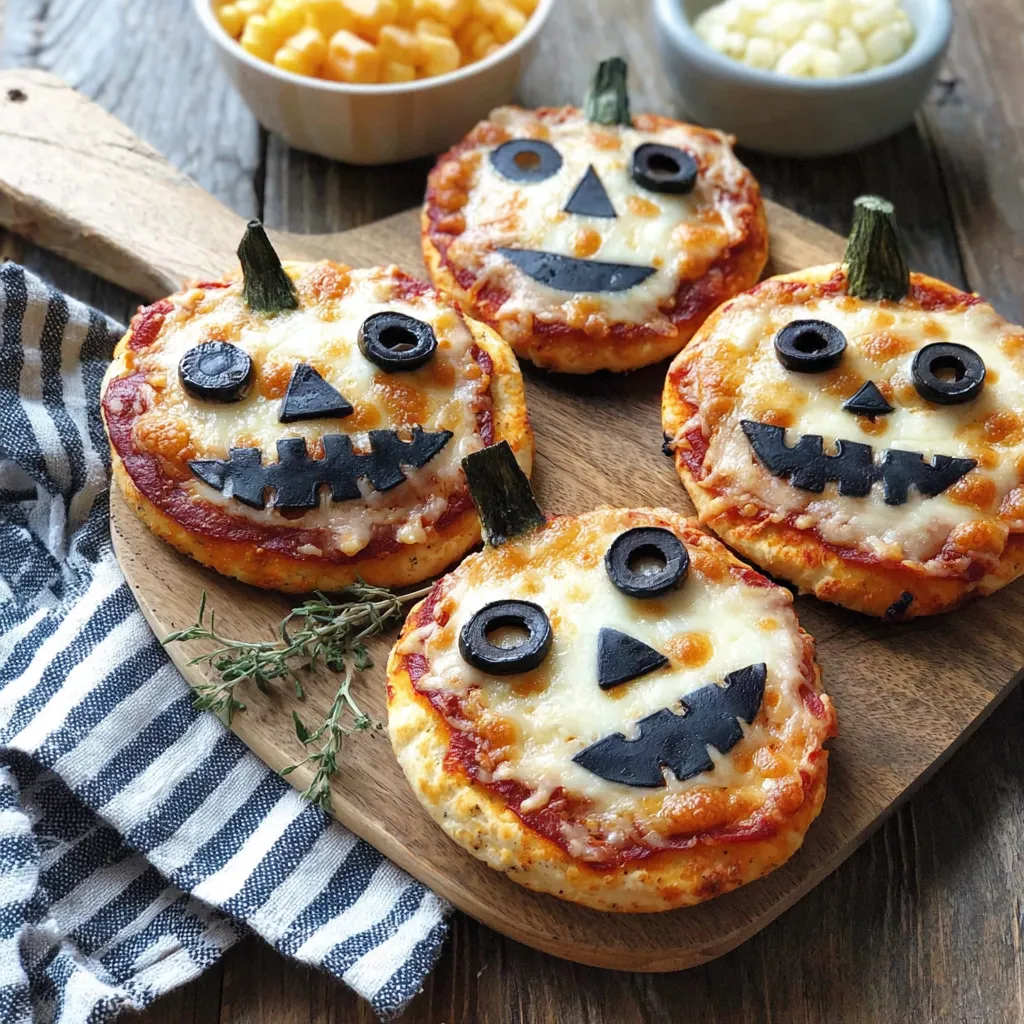
- This is where creativity shines. Place olive slices in pairs to create spider eyes or full spider bodies. Use the bell pepper strips to form jack o lantern smiles and eyes, arranging orange pieces in curved formations and green as stems. For the mummies, add two small olive slices in the exposed area between cheese strips.
- Bake To Perfection
- Place your decorated pizzas in the preheated oven for 10 to 12 minutes, watching carefully near the end. The pizzas are done when the cheese is fully melted and the edges turn golden brown. Remember to rotate your pan halfway through baking to ensure all pizzas cook evenly.
- Final Touches
- Remove from the oven and allow to cool for exactly 2 minutes. This resting period lets the cheese set slightly while keeping the pizza hot. Sprinkle fresh basil over the top just before serving to add color contrast and a fresh herbal aroma.
 Bookmark
When my daughter was five, she insisted her mummy pizza had actually winked at her when she took her first bite. Now, eight years later, she still makes a tradition of creating pizzas with moving parts and telling spooky stories about each one as we eat them.
Make Ahead Options
These festive pizzas work wonderfully as a make ahead option for busy Halloween nights. You can prepare all the toppings up to two days in advance, storing them separately in airtight containers in the refrigerator. For an even quicker assembly, you can partially bake the crusts with sauce for 5 minutes, cool completely, then freeze them. On Halloween day, simply add your toppings to the frozen bases and bake for an additional 8 minutes until hot and bubbly.
Dietary Adaptations
These spooky treats can be easily modified for various dietary needs without losing their festive appeal. For gluten free guests, substitute cauliflower crusts or certified gluten free pizza bases. Dairy free versions work beautifully with plant based cheese alternatives that still melt and stretch. For vegetarian options, replace pepperoni with mushroom slices cut into fun shapes, or use plant based pepperoni alternatives that provide similar flavor and texture.
Theme Variations
While Halloween themed designs are perfect for October, this versatile recipe transforms for any holiday or occasion. Create snowmen and reindeer faces for Christmas, heart shaped designs for Valentine's Day, or flower patterns for spring celebrations. The basic technique remains the same, just swap out the design elements and colors to match your theme. My family has created a calendar of pizza art that gives us something to look forward to throughout the year.
Serving Suggestions
Arrange these mini masterpieces on a large black platter surrounded by Halloween themed sides like carrot witch fingers with hummus dip, ghost shaped cheese slices, and grape eyeballs. Add dry ice in a separate bowl nearby for a smoky effect that delights guests. For a complete meal, pair with a simple side salad tossed in a blood red cranberry vinaigrette to continue the theme while adding nutritional balance.
Recipe FAQs
- → Can I make these mini pizzas ahead of time?
Yes! You can assemble the pizzas completely and refrigerate them for up to 8 hours before baking. Alternatively, par-bake the crusts for 5 minutes, cool completely, then freeze with toppings for up to 1 month. When ready to serve, bake from frozen at 425°F for 12-15 minutes.
- → What are some other spooky topping ideas?
Get creative with red bell peppers for 'bloody' drips, black olive spiders with sliced green onion legs, mushroom 'eyeballs' with olive pupils, prosciutto 'brains', or thinly sliced tomatoes for monster mouths. Colored cheese can also create unique effects!
- → How can I make this activity kid-friendly?
Set up a 'build-your-own' station with pre-portioned toppings in small bowls. Pre-sauce the crusts for younger children, then let them create their own spooky faces. Use cookie cutters for cheese shapes if you have them, and prepare some example designs for inspiration.
- → Can I make these gluten-free or vegetarian?
Absolutely! Substitute gluten-free pizza crusts or flatbreads for the base. For vegetarian versions, simply omit the pepperoni and add extra vegetables like mushrooms, colored peppers, or corn kernels shaped into spooky patterns.
- → What can I serve with these Halloween mini pizzas?
Create a complete Halloween spread with 'witches brew' punch, veggie sticks with green 'slime' dip (avocado or herb yogurt dip), mummified hot dogs wrapped in pastry strips, deviled egg 'eyeballs', and fruit skewers with melon balls and berries. Finish with brownie 'graveyards' topped with cookie headstones.
- → How do I get the mozzarella strings to look like mummy wrappings?
Pull string cheese apart into thin strips rather than cutting it. Lay the strips in a criss-cross pattern across the pizza, leaving a small gap for the 'eyes' (typically made with olive slices). The irregular thickness of hand-pulled cheese creates a more authentic mummy bandage appearance.